Chocolate Cupcakes with Chocolate Ganache

In my search for the ultimate chocolate cake, I have tried countless recipes. My idea of a luscious chocolate cake is one with a deep dark flavour, almost bitter with just a hint of sweetness. The consistency has to be dense and moist, not crumbly. I have only come across one cafe that sells such a cake. I have tried but I can’t for the life of me duplicate that recipe.

Last weekend, after a long hiatus, I decided to indulge in some chocolate cupcake baking. I had a particular friend in mind throughout the project. She is the biggest chocolate lover I know. I was determined to make her day (or week depending on how many helpings she has!).

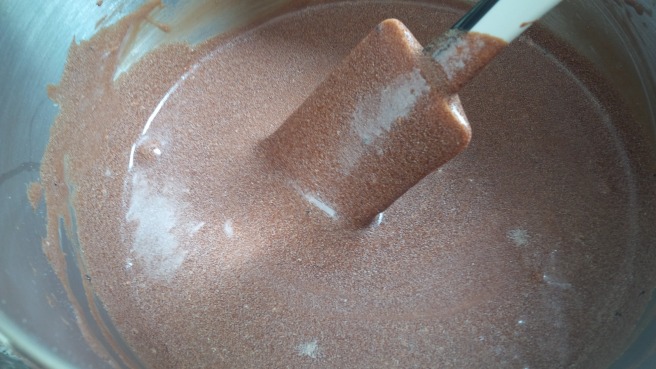
I decided to try this recipe by The Barefoot Contessa, Ina Garten. It had received rave reviews.

It was fortuitous then that my local shop had just stocked up on lots of Baker’s and Ghirardelli chocolate and Hersheys special dark. Bliss.
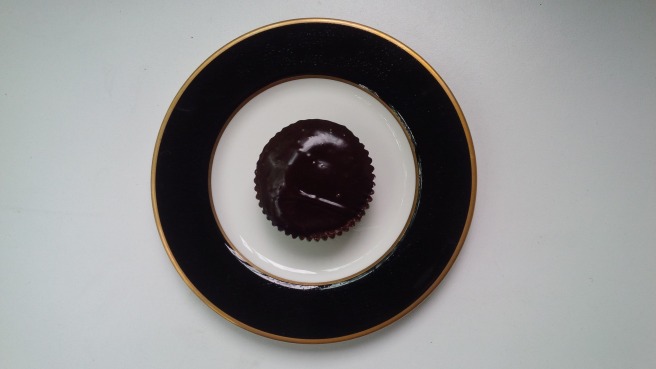
This ingredient made me question the recipe but I thought what the heck, I’d give it a try first before I made any judgements
IMG_20150823_114002
Here’s something I’ve learnt. No matter how pretty the liners are, the design gets obscured by the oils after the cupcakes are baked! Unless you double line or the colours are very intense.
IMG_20150823_114018
I got a wee bit worried when I ended up with this runny batter… but I put my trust in Ina and persevered
IMG_20150823_114040
Forgot completely to take photos in my excitement to try out the recipe so this is all I got of the cake mixing process 😛
IMG_20150823_115149
The batter was quite watery, not your average cupcake batter. As the recipe did not contain any leavening agents, I filled the liners all the way to the top
IMG_20150823_125854
Straight from the oven. It took 35 minutes of baking. See how gorgeous they turned out?
IMG_20150823_134517
Out of practice. I forgot to take a photo of the lovely chocolate chips and cream before they melted. That was a lovely sight indeed.
IMG_20150823_134841
THIS part I enjoyed the most! Dunking those cupcakes face down into the ganache 😀
IMG_20150823_135943
Look at that sheen. Absolutely beautiful.
IMG_20150823_140352
Love that deep dark colour
IMG_20150823_175124
Mmmm… moist
IMG_20150823_205221
I wanted violet flowers like Ina had but this is all I could source. Butterflies 🙂

The verdict:

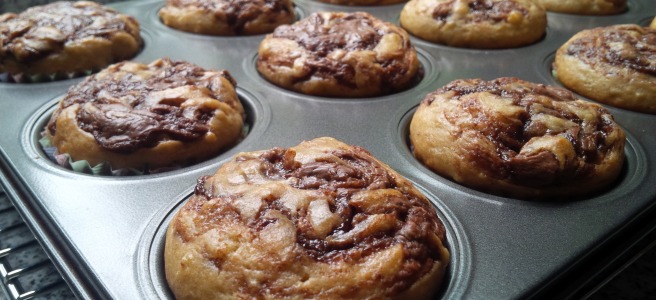
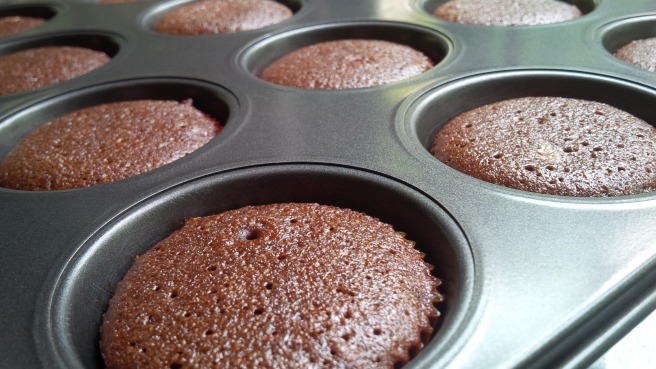
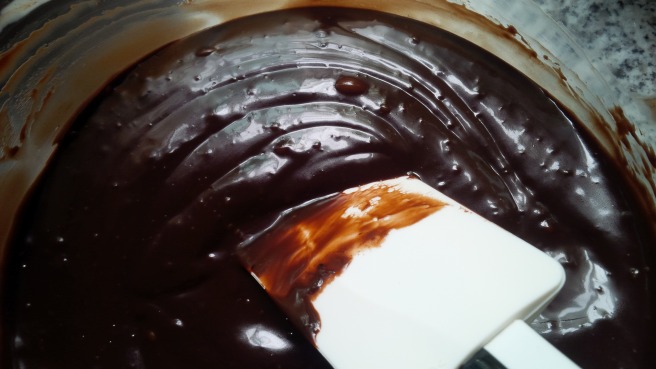
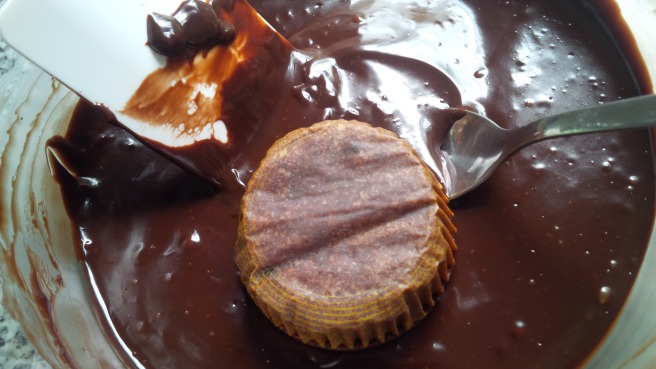
The cupcake was lovely, moist and dense. The ganache was just the right consistency, not runny and not brick hard. Perfection. The taste… I had an inkling it would be too sweet despite the majority of commenters declaring that it was just right. To each his own, I suppose but many of my guinea pigs agreed that it could do with a little less sugar. Even the chocolate lover extraordinaire.

Now I have to confess, although I personally would prefer the ganache made entirely of dark chocolate chips, at the very last minute before I melted the chocolate, I decided to use half dark and half milk. The reason was that I was afraid that non-chocolate aficionados might not be able to appreciate it and all these cupcakes (27 tiny ones) would go to waste.

I would definitely attempt this recipe again but would either cut down the sugar (to 1/2 or 3/4 cup) or replace half the chocolate syrup with unsweetened cocoa powder and some sour cream. I would also make the ganache as it was meant to be made with entirely dark chocolate chips.

The search for that ultimate chocolate cake recipe continues…

Oreo Vanilla Cupcakes

I feel like this is a cheat of a recipe since what I did was simply to dump some crushed Oreo cookies into my favourite Vanilla Cupcake recipe and then made the frosting by dumping some more of those crushed Oreos into the Swiss Meringue Buttercream Frosting recipe but still… it was a project so it deserves a post 😛

See, this blog also serves as my own recipe book/reference so I can remember what recipes I use and what I did wrong or what I tweaked.

IMG_20150504_131859
These liners were cheap and I loved the fuchsia colour but they were too flimsy and too often got stuck onto the cupcakes
IMG_20150504_131515
The batter
IMG_20150504_132346
Crushed Oreos in the vanilla cupcake batter
IMG_20150504_142016
Gorgeous gorgeous gorgeous fluffy buttercream
IMG_20150504_142037
Can’t get enough of it. Like liquid marshmallow, which I guess it sort of is
IMG_20150504_142230
Crushed Oreos go into the buttercream. Was a bit worried here if the whole thing would collapse on me but it didn’t
IMG_20150504_143028
The final product!


The verdict: Lovely combo of vanilla cupcakes and Oreos although I thought it had a tinge of bitterness probably from my baking soda? Advice: Don’t buy cheap liners!

Turkey, Spinach and Mushroom Breakfast Muffins

I saw this idea online about making savoury breakfast muffins in advance for the week. All breakfast would then entail was to take one (or two) of these babies out of the fridge and pop them into the microwave and tadaah… Breakfast! The idea was captivating. So I tried it.

Lots of recipes out there with variations of ingredients but the main one is egg. It’s basically a muffin-shaped omelette and you can choose whatever you want in it. I’m hungry just writing about it!

My choice for this maiden voyage were turkey slices, spinach and mushrooms. The problem with the site I got this recipe from was that it didn’t specify amounts of salt and pepper. It’s a personal choice, I suppose, but it would be helpful to have a rough idea. Absolutely no offence to the author.

Anyway, here is the basic recipe from which I built on. I think.


IMG_20150621_130002
Gorgeous green spinach
IMG_20150621_130013
Turkey slices, mushrooms and diced onions (I suspect I went a little overboard with the onions)
IMG_20150621_130504
Sautee onions with mushrooms
IMG_20150621_130512
Chop the turkey slices into precise uniform small sizes. No variation will be tolerated
IMG_20150621_131439
Add the spinach to the sauteed onions and mushrooms
IMG_20150621_131639
To a mixing bowl, add 4 large eggs
IMG_20150621_131924
Add the cheese to the whipped eggs along with some salt and pepper. Just guess like I did!
IMG_20150621_132924
Pour the mixture into the muffin tray and top them up with more cheese
IMG_20150621_132933
Here’s a close up. Beautiful?
IMG_20150621_135514
Fresh out of the oven. Just look at that yummie melted cheese…
IMG_20150621_135524
Forgot to say, spray the muffin tray generously with oil before you scoop the filling in. Alternatively, I suppose liners could be used too


I based my muffins or quiche on the recipe but played around with it and added my choice of ingredients. It was fun to make and the anticipation of having breakfast so conveniently ready in a neat package was a delight.

The verdict:

I may have used too much oil because my muffins turned out rather oily every morning when I heated them up. They were rich in flavour. Quite filling too with a cup of coffee. On hindsight, I wish I had used liners instead of going au naturel. Would have been much less stressful removing the muffins from the pan. When will I ever learn?

Would definitely make these again, maybe using that intriguing quinoa recipe. Definitely makes breakfast a doddle.

Banana Muffins with Nutella Swirls

When I was in uni, a dynamo of a classmate of mine, Claire McTiernan, gave me her ever-so-simple recipe for banana bread. It was fantastic. Simple and always a hit. Everybody fought for the crust. I’ve lost it or it may be somewhere in my recipe book (remember those times before iPads?).

I decided to revisit the humble banana bread but add a little twist to it and I chanced upon this recipe at The Novice Chef.

IMG_20150614_121052
They didn’t have any over ripe bananas. Just these lovely bright yellow ones


IMG_20150614_123009
So I followed a tip about putting them in the oven for 15 minutes. Fifteen, not 30 like what I did and ended up with cooked bananas


IMG_20150614_123810
See?


IMG_20150614_124021
Anyway, in goes the brown and white sugar, oil and vanilla extract


IMG_20150614_125205
Fold in the flour, baking powder and soda


IMG_20150614_130414
Scoop them into the cupcake liners and plop a teaspoon of Nutella in the middle


IMG_20150614_130841
Attempt your hardest to do an artistic swirl with a toothpick. Good luck with that as the dense Nutella ain’t budging and you’ll only end up pushing the banana batter over the edge. Or yourself..


IMG_20150614_133228
Well, here is my best effort


IMG_20150614_133201

Truth: I never got to eat any so I can’t really tell you the verdict first hand. No muffins left though, so I’m guessing they were passable 😛


Steak and Mushroom Pie

A while ago, I made my first trip to Australia to visit some friends. We did the usual koala picture-taking, hiking, visits to museums and parks. Visiting Australia doesn’t quite seem like being in a foreign land, partly because there is no foreign language to fumble through and all signs are in English. The food too is not a great departure from what I get at home. What I did fall in love with were their pies. Absolutely loved them. So on my return home, I decided to try my hand at making some.

I got the recipe from BBC’s Good Food website. The recipe called for ale but I omitted that and replaced with more broth. Tasted good enough without it so I won’t know what I’m missing!

IMG_20150530_142719
Browning the beef cubes. The most important part, they tell me and not one to be rushed.
IMG_20150530_142801
Mushrooms and carrots waiting their turns while the beef browns. I was very good this time. I prepared everything in advance instead of flying around the kitchen trying to do everything at the same time as I usually do

IMG_20150530_143631

IMG_20150530_143927

IMG_20150530_144059
Saute the onions and carrots
IMG_20150530_153532
The mushrooms are fried with the bacon and added to the stew just before it’s popped into the pie case and then the oven
IMG_20150530_161929
The filling or stew with the luscious home made broth. Divine.
IMG_20150531_120722
Make sure you flour the pie dish generously
IMG_20150531_123550
In goes the filling
IMG_20150531_124841
🙂
IMG_20150531_135300
Tadaah! I know it’s all wonky but quite an achievement for me!


Can I confess that I cheated on the pastry? There, I have. I wanted short crust. I love short crust but I am simply not a pastry person. And with all those ready made vegan ones available in the market, why would I slave through knead-fold-refrigerate cycles again? I do realise the irony of writing “vegan” there when I’m talking about beef pie. I meant that there are options when making desserts for my vego friends.

What I also did differently was to cook the stew in my pressure cooker to cut down the cooking time and to make the meat soft and succulent. I let it cook for about 30 minutes after pressure was reached. I did have to thicken the stew afterwards with a corn flour slurry as pressure cooking retains the fluids unlike normal simmering.

The verdict:

This was a special request from my sister (“When are you making that pie for us?”). The family loved it. Eat warmed up with some gravy and mash.

Strawberry Cheesecake Streusel Muffins

What attracted me to these muffins was not their name but their appearance. A casual search on Pinterest led me to these beautiful strawberry-filled muffins. They looked positively delectable, how could I not try them out?

Cream cheese is always a joy to work with and very fulfilling in terms of outcome and flavour. Fruit of any type just tricks us into thinking the dessert is more healthy than artery-clogging. It’s a win-win situation, really.

I got this incredible recipe from The Recipe Critic.

IMG_20150517_113022
Luscious strawberries
IMG_20150517_113939
Cut into small pieces. Not too small though because you want to be able to appreciate the fruit when you bite into the muffin

IMG_20150517_114756_edit

IMG_20150517_115617_edit

Batter followed by strawberries, then cheesecake mix and finally my lumpy streusel.

IMG_20150517_114854IMG_20150517_120106

Confession: I did not adhere strictly to the recipe. I didn’t want to use only half of the 8 oz block of cream cheese and store half of it only to be forgotten in the bowels of my fridge, so I used all 8 oz. I also failed to read the assembly instructions properly (in my unfounded fear that the batter would not be sufficient for 12 muffins) and instead of layering batter-strawberries-cheesecake-streusel-batter-cheesecake-strawberries, I did batter-strawberries-cheesecake-streusel. I’m not sure if this made any difference to the flavour but I think it made the muffin less interesting-looking. UPDATE: They did make the cupcakes bottom heavy with the batter at the bottom and cream cheese on top. It would have been far more interesting in terms of gustatory enjoyment and presentation to layer it as advised. Another problem I encountered was that my streusel came out sticky and clumpy and not resembling coarse wet sand at all! I tried adding more flour. It made it less sticky but still not the consistency that I wanted. I’ve since read up a bit and some websites suggest refrigerating the streusel. I suspect heat had dissolved the brown sugar and made it clump.

The verdict:

These muffins all disappeared in one go! Some shared a muffin, others refused to (!) but the plate was all but clean within a few minutes of being presented. They loved it (hey, cheese and strawberries were involved here – a magic combo). So A for taste and C+ for presentation (my fault).

Swiss Meringue Buttercream Frosting

Frosting is the perfect accompaniment for cupcakes. Indeed, would cupcakes be cupcakes without them? But buttercream frosting has always been a little too sweet for my taste. A delightful treat when you’re a child but not so healthy as you get older.

I only knew of 2 frostings before this: American buttercream and cream cheese frosting. The former, just too damned sweet. The amount of sugar in a recipe is just crazy BUT reduce it to your frosting’s detriment. The sugar is necessary for the frosting to maintain its pipeable consistency.

Cream cheese frosting was an alternative which allowed for less sugar since the cream cheese could contribute some firmness to the frosting but the consistency was too unstable and required constant refrigeration.

Then I discovered Swiss meringue buttercream frosting. If you google “swiss buttercream”, chances are you’ll find The Woodland Bakery Blog. I love how raw and unscripted Gretchen Price’s videos were in the old days. And I find the interaction between her and Jason, the cameraman, just hilarious. She gives good advice and her instructional videos are really informative to a novice like me.

This is her recipe for The World’s Best Swiss Buttercream.

Gretchen also gave me (well not me personally but on her blog) one valuable advice, “I make it a rule not to ever change a recipe before I have had a chance to try it”. Fair enough. So although I was sceptical of the additional icing sugar in the recipe, I stuck to the recipe the first time. Then the next time, I omitted the icing sugar.

IMG_20141102_085032

The consistency of the swiss meringue is just perfect. The swirls are well defined and keep their shape. Beautiful.


IMG_20141106_093004
Close up. Some air bubbles are inevitable but just look at that frosting. Check out my bling phone cover in the background.


By the way, I added melted chocolate in the basic swiss meringue recipe for these vanilla cupcakes.

The verdict: The consistency of this frosting is perfection. It is easy to pipe, the shapes come out firm and stable. Too sweet with the icing sugar (not just for me but many of my guinea pigs at work agreed) so omit it if you want to live longer. The running joke I tell when colleagues thank me for the cupcakes is that I am actually trying to kill them one at a time with sugar so I can ultimately be the boss.

Don’t kill your colleagues. Kill the sugar.

Mini Peach Cobblers with Creme Anglaise

I’m trying to eat more fruit. But really, I rarely ever chomp on an apple and I laugh in the face of those bruised bananas glaring at me from the counter at Starbucks. I have discovered though that when they somehow end up in a dessert, I am less of a fruit snob.

Baby steps, ok? Canned fruit. Hee.

IMG_20150426_125952
Diced peaches

IMG_20150426_130143IMG_20150426_130325

IMG_20150426_130452
A teaspoon of melted butter followed by two tablespoons of batter
IMG_20150426_130903
Then a tablespoon of peaches
IMG_20150426_131219
Topped with a sprinkle of brown sugar and cinnamon

IMG_20150426_132555IMG_20150426_142326

Many have warned that the cupcakes would be a bit messy to remove from the tin but I had recently had a bad experience with some fruit-topped cupcakes sticking to the liners and accidentally being eaten so I thought I’d take a risk (with some liberal use of spray oil).

But as you can see, ’twas a semi disaster. So I ate them straight from the pan. Don’t judge me.

Here’s the link to it at The Recipe Critic.

I would suggest you cut down on the sugar in the batter as the peaches are canned in syrup (if you use canned peaches). The brown cinnamon sugar topping also adds sweetness so beware.

As an accompaniment to this cobbler, I decided to make creme anglaise. I thought it would be a nice change to vanilla ice cream. Since I had already tasted the sweetness of the cobbler, I decided to reduce the sugar in the creme to balance things off.

Here is Stephanie Jaworski’s recipe for Creme Anglaise. Absolutely sinful. When I first took up baking again after a decade-long hiatus, I discovered her website, Joy of Baking. She has wonderful, well-explained instructive videos and she even gives a brief history of the recipes. I love that. Sometimes, I can see her dog in the garden through the french doors! 😀

Well, she may give good instructions but I did everything she told me not to. Like overcook the creme over too high a heat. I got curdled anglaise. But never fear, she even anticipated that and gave instructions on how to fix it. And it worked! Pure genius.

IMG_20150426_140224IMG_20150426_140532

IMG_20150426_151715
Damn that rogue drop of creme
IMG_20150426_153816
The final product. Which I ate. To test. Of course.

The verdict: Sweet! Well desserts are peculiar that way.

Spice Drawer Organisation Project

I have to admit, my spice drawer wasn’t too bad to begin with. When I first planned my kitchen, I found lovely photos of spice drawers with all the uniform bottles lying at a slightly elevated angle all within easy reach of the stove. My budget did not allow it and I wasn’t sure if I could afford all that cabinet real estate with all my kitchen utensils. My kitchen does not have overhead cabinets. A feature I was very determined I would not have. The kitchen is quite large, as kitchens go, with wraparound windows looking out to the garden. I wanted to maintain  a clutter-free open, space with plenty of natural light, something I feared overhead cabinets might prevent.

Back to my spices. I’ve accumulated quite a lot since the kitchen was open for business. At first, I pictured the VARIERA Ikea inserts would be perfect but alas, I found out that my drawers were not deep enough. The only solution was to either saw them to fit (thus reducing the number of bottles they could hold) or to place them sideways in the drawer. Please, understand, this goes against every OCD grain in my body. But I had little choice. Everything must be kept away in it’s space. No counter top clutter for me.

Sorry. My BEFORE photos aren't as horrific as you might expect
Sorry to disappoint. My BEFORE photos aren’t as horrific as you might expect.

One of many prized possessions of mine is the Dymo labeller. I just love to label. Even when I actually know where everything is in the filing cabinet in my head (although I admit I guess a lot). Good for quick identification of whatever is in that mystery box. Ideal for spices.

IMG_20150420_153131
Here’s my trusted Dymo churning out the labels. I love label makers. Almost as much as I love shoes. Almost.


I decided to get these inexpensive magnetised containers with clear lids. Allows you see how much spice you have left and the different shades of spice make for an interesting landscape. And because to me garam masala looks like cumin looks like coriander looks like nutmeg, the labels are absolutely essential!

IMG_20150502_135831
Looking at this brings me peace. And indeed I open the drawer just to admire it ever so often.


IMG_20150502_135925
There was space for no more than for 4 x 5 containers so I used some tension rods to corral them in to minimise movement when I open and close the drawers. The space on the left I used for the original bottles of seasoning.


Took me a few weeks to finish this project partly because I had to go to several Daiso outlets to get enough containers.

The end result is very satisfying. I love it when things are organised. Makes life so easy. Cooking will be even more fun now!

Psst… let’s not think about the possibility of my needing more spices in the future than I have room for in that drawer. Let’s enjoy the moment (including that one empty spare container reserved for such an eventuality).

Vanilla Cupcakes with Strawberry Cream Frosting

The first cupcakes I made in my new kitchen were vanilla cupcakes. I did the usual online research (the internet is a wealth of information that I wonder sometimes why people spend money on cookbooks) and found this recipe from The Cupcake Project. I must say, I absolutely love them and they are my go to recipe for vanilla cupcakes. They always come out perfect. Moist with a cake-like consistency.

The frosting… Well, the world is your oyster really. Knock yourself out with any flavour you fancy. I made strawberry and raspberry cream frosting this time but have frosted these cupcakes with everything from chocolate to peanut butter to lemon curd. I can’t remember where I got the recipe for the cream frosting so I can’t put a link but here is the recipe in full. Gratitude to whichever website/ blog I got this from. I did a search and just could not find you so if you read this, please own up. I take zero credit.

Strawberry Cream Frosting

  • 1 cup whipping cream
  • 1/2 package (4 oz) cream cheese at room temperature
  • 1/4 cup unsalted butter, at room temperature
  • 2/3 cup icing sugar
  • 1 tsp vanilla

4-5 strawberries (or raspberries or whatever fruit you have in mind), frozen or fresh

Method

  • Using an electric beater, or by hand, whip the whipping cream until it reaches a soft peak and set aside.
  • Using an electric mixer, beat together the butter and cream cheese until it is fluffy and well combined. Having the cream cheese at room temperature will prevent any lumps in the mixture.
  • Add the icing sugar and the vanilla to the butter and cream cheese and beat well.
  • Using a small food processor or immersion blender, or even just a very sturdy spoon, puree the strawberries until you have approximately 3 tbsp of juice.
  • Add the strawberry puree to the butter mixture and mix well.
  • Gently fold in the whip cream into the frosting.
  • Using a piping bag, frost the cupcakes with a large tip.

Store in the fridge, removing approximately 20 minutes before serving to allow the cake to come back to room temperature.

IMG_00000346
I love taking photos of the frosting in progress because it looks so irresistably fluffy! So please, bear with me.


IMG_00000347
Beautiful, aren’t they? I should have taken photos of my earlier wobbly work so you can appreciate that I have really come a long long way!
IMG_20141026_101359
This batch, I thought it would be an excellent idea to pop some raspberries on them. Then I realised they resembled boobs. My male friends appreciated them though.
Don’t believe me? Here’s one from a different angle (pardon the lighting)


The Verdict: The cream frosting is lovely and light with a hint of fruit. Perfect with vanilla cupcakes but probably even better with chocolate ones. Will try that very soon. A very refreshing dessert.